Multi-bitrate Streaming Using Encoder Software (New Version)
How to Start the Multi-bitrate Streaming Using the Encoder Software?
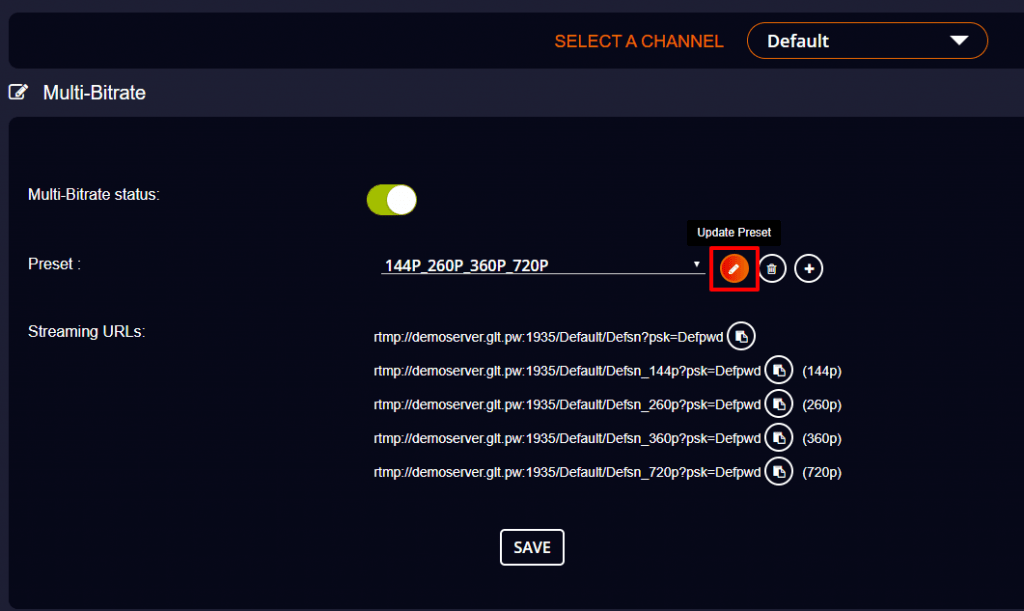
- Go to Multi-Bitrate from the navigation menu.
- In the Multi-Bitrate settings, select your streaming channel first.
- Now turn on the Multi-Bitrate button.
- And select any preset of resolutions of your choice by clicking the drop-down menu.
- Then click the “Save” button.
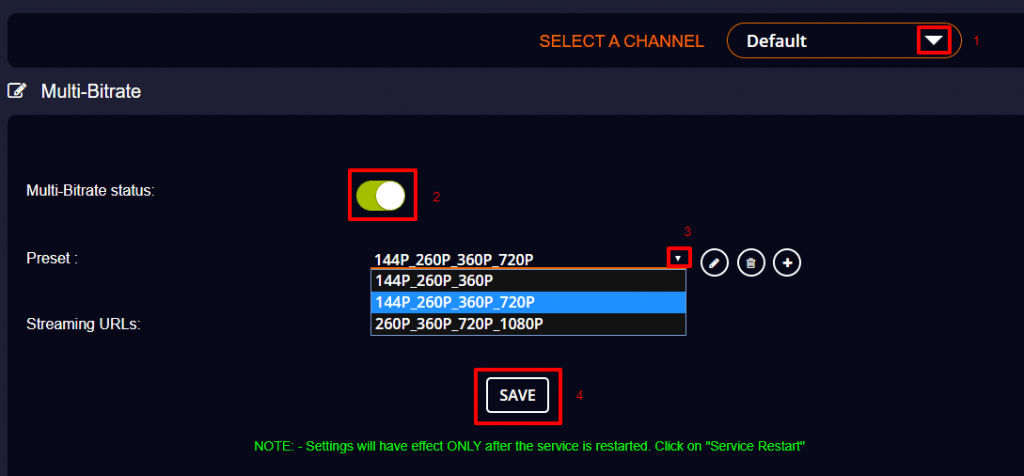
- Now give “Service Restart”.
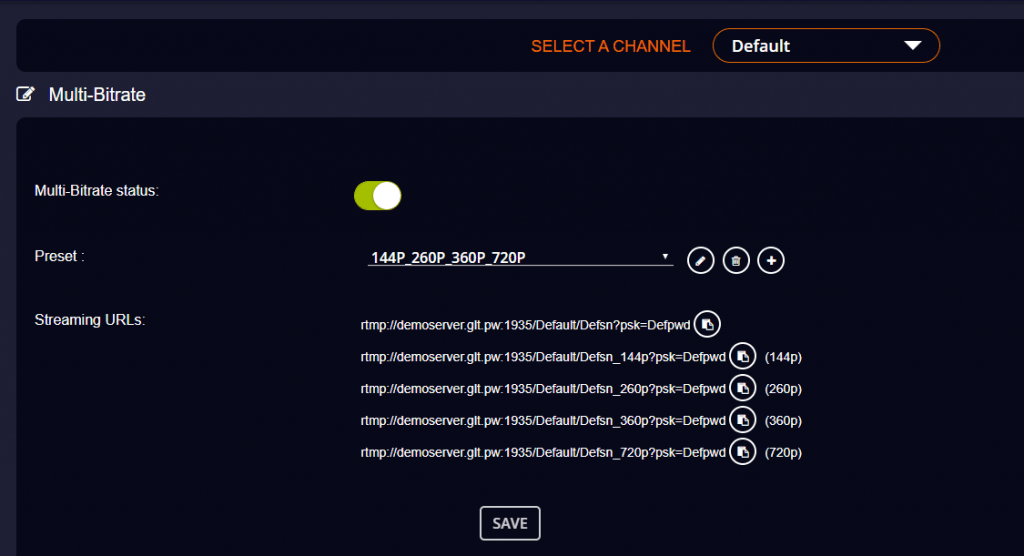
Now the Multi-bitrate settings have been applied to the Livebox streaming server. You can start proceeding with the Encoder settings.
Open the Mixer and Playout software. You can either set up your streaming source from your camera device or by using the playout software.
- So, after setting up your camera or adding the streaming source using the playout, open the Encoder window.

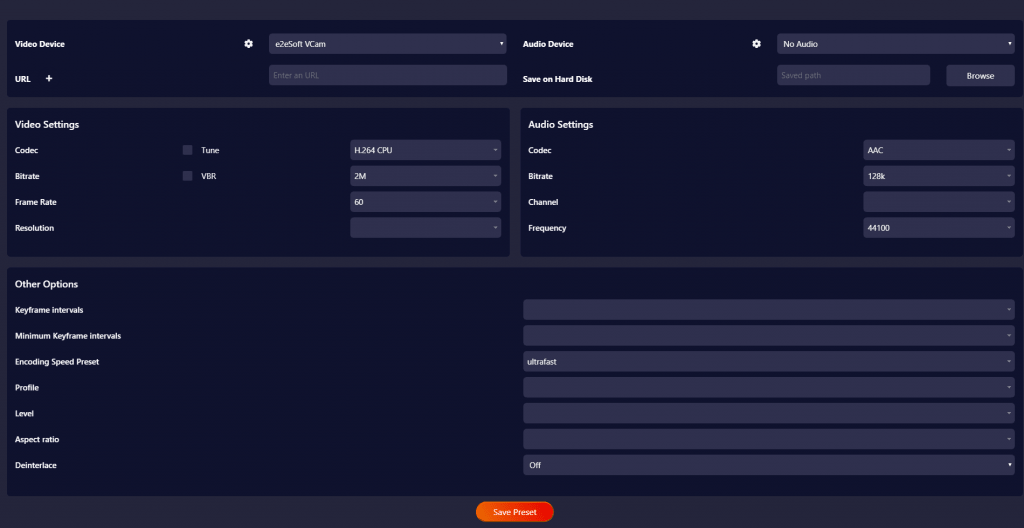
- On the Encoder settings window, click the gear icon to create presets for the resolutions you have selected.
Note: It is advisable to create presets for the Multi-bitrate streaming beforehand for the resolutions you prefer.
- Now on the settings, you can create Presets by entering the Audio Bitrate and Video Bitrate for each resolution.
- So, to get the Video Bitrate and Audio Bitrate values of your resolutions, go to the Livebox Multi-bitrate settings.
- On the Multi-bitrate settings, click the edit icon.
- A dialog box opens, where you can get the details of the resolution preset you have selected.
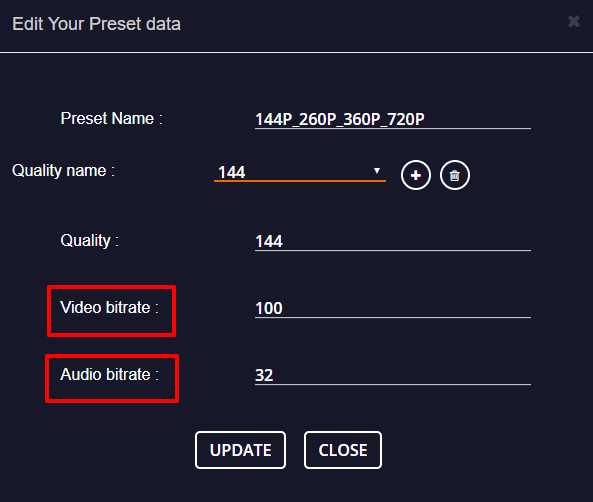
- And here you can click the drop-down menu to select the specific resolution and to get its values.
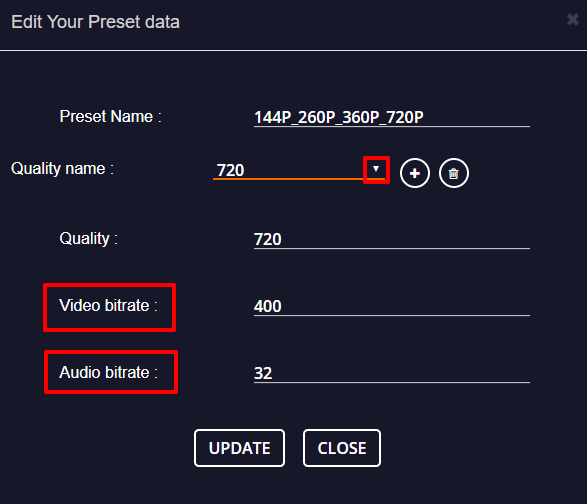
- Back on the Encoder settings, you can enter the Video Bitrate and Audio Bitrate of the resolution you have selected.
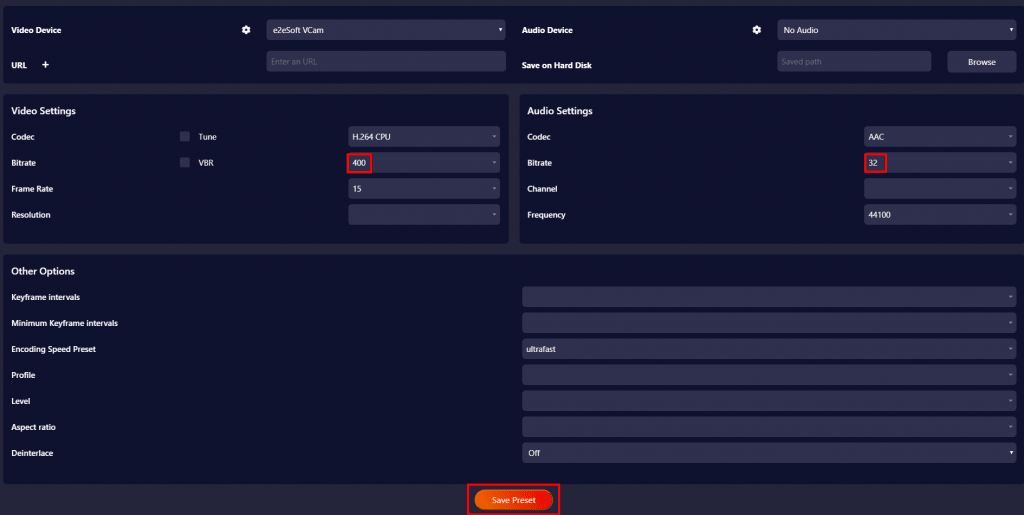
- Also, select the pixel of the resolution for which you are creating a preset.
Note:
- 144p- 2560×1440 px
- 240p- 352×240 px
- 360p- 480×360 px
- 720p- 1280×720 px
- 1080p- 1920×1080 px
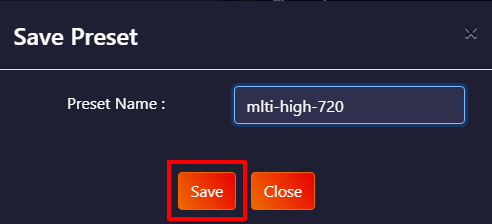
- Then click the “Save Preset” button.
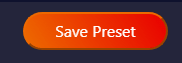
- Now you can give a name for your preset. Likewise, you can do the same for all the other resolutions.
- Back on the Multi-bitrate settings, first, copy-paste the channel RTMP URL on the Encoder settings.
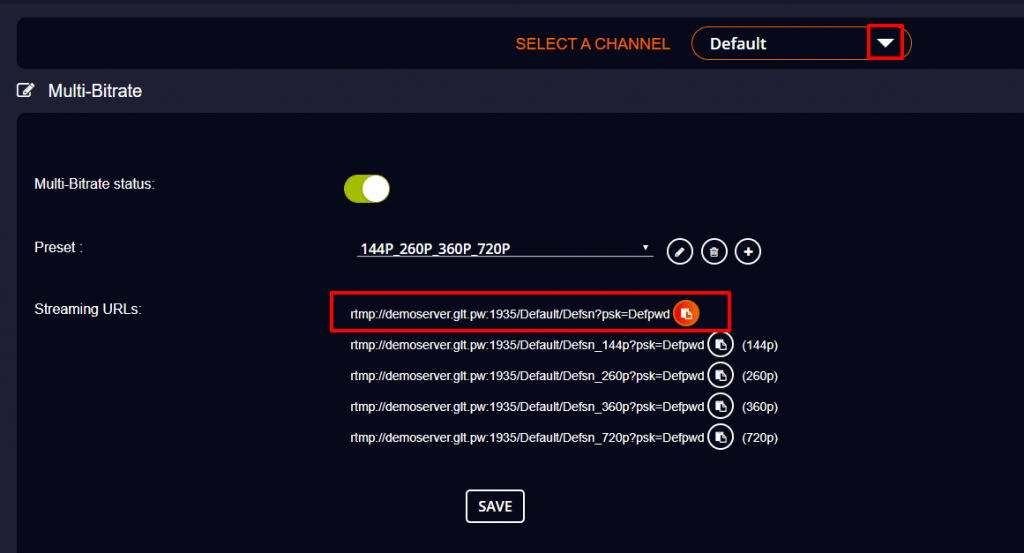
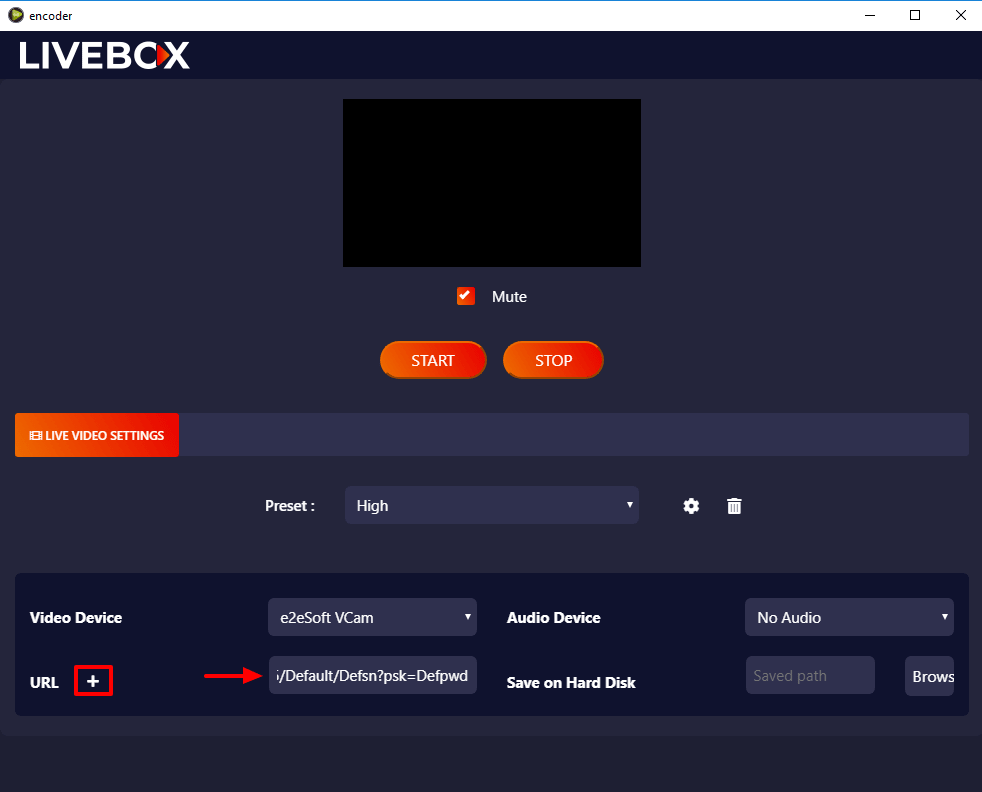
- Followed by the channel RTMP URL, also enter the URLs of resolution.
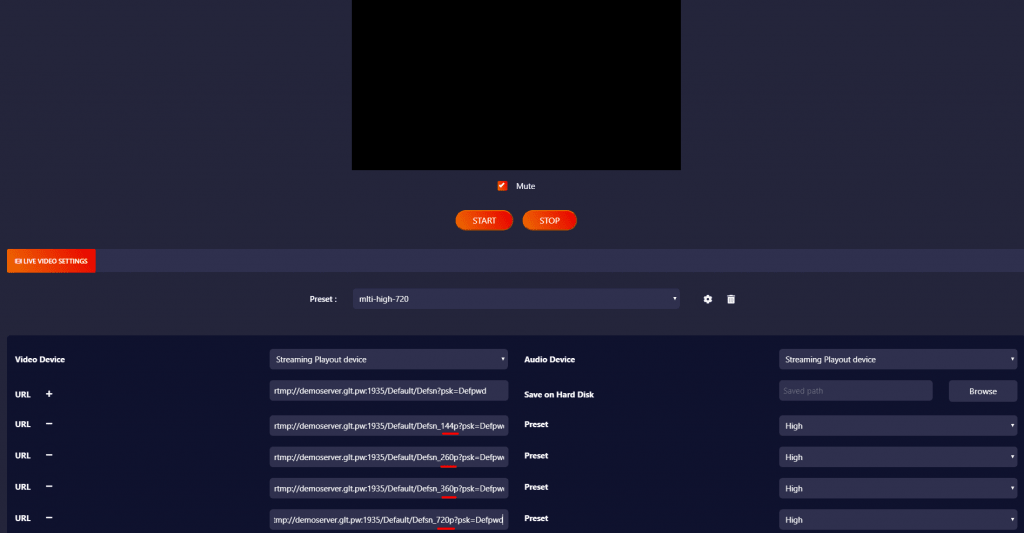
- Then select Presets for each resolution. (Presets you have created for each resolution)

- Now click the “Start button” to initiate the live on your server channel with streaming qualities (resolutions).
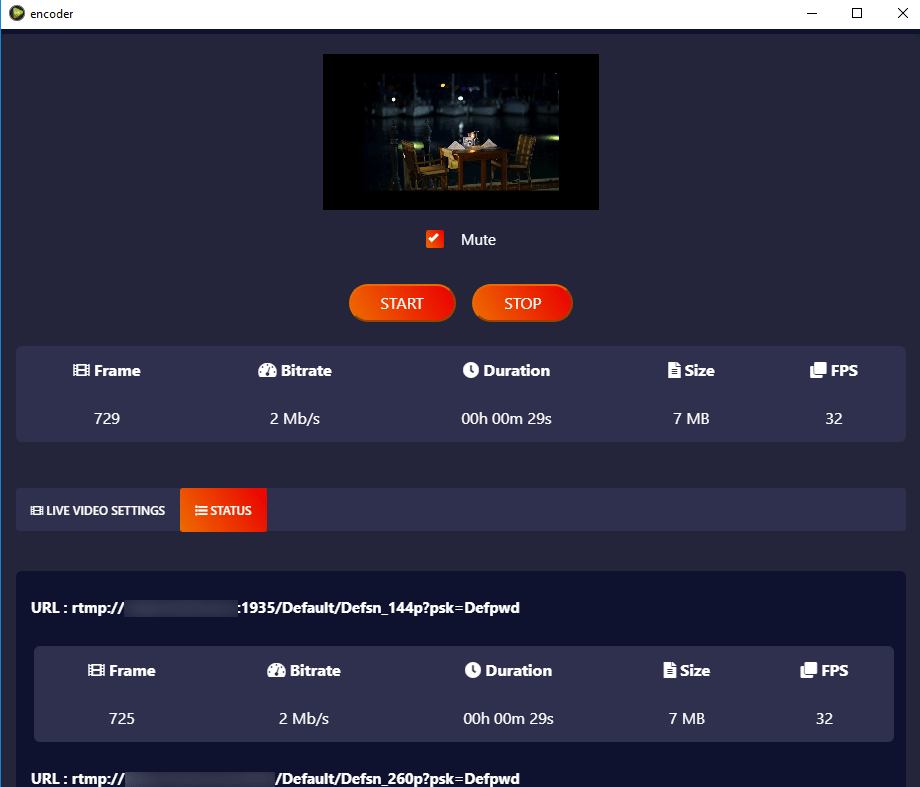
- Have a look at the server dashboard. And it will display your live streaming source along with the streaming resolutions.

You can go on by pushing the live stream to all your social media accounts, where your viewers can adjust the video quality according to their bandwidth.


Comments
Post a Comment